
Hello again, as you know that nowadays there are lots of discussion about native/national software. The most controversial subject is about operational systems, especially about Pardus and Windows. Actually, I’m not a specialist on these topics so I try to say nothing 🙂 In addition to operational systems, we must consider other systems/solutions to exchange with free software solutions, such as office apps, engineering apps, graphic design apps and of course firewall solutions.
The last month, I looked at FortiGate solutions and I observed some example scenarios using virtual lab. In this post, I will write about pfSense solutions which is an alternative for FortiGate. Firstly, I must say that installation steps of pfSense are more complex than FortiGate steps 🙂 Maybe you know, all open-source projects has this problem to redirect you to technical support for earning money from you 🙂
When I met firewalls in last month, I liked them and I said that I would use this always, even at home 🙂 Now, I’m trying to discover them, and I liked pfSense.
Before we begin, let me summarize all steps;
- Install: Typical installation, follow the instructions.
- Configuration: There are lots of network cards/adapters on firewall devices and they are used to route packets. And firewall software manage these adapters to block or pass network packets. Administrator have to set adapters for WAN, LAN1, LAN2, LAN3 etc.
Let’s begin
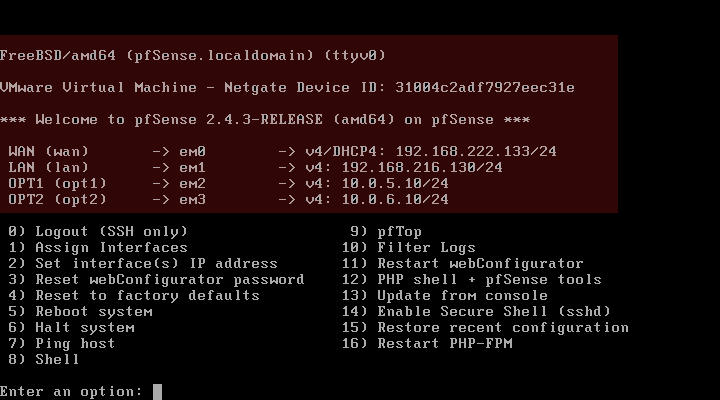
After the installation is completed, you must see this screen. (Red area must be different, configurations were completed in my screen)
As you see, there are some options to move on. But first of all, we have to set the adapters for their tasks so we use (1) Assign Interfaces. I have 4 adapters for my demo example.
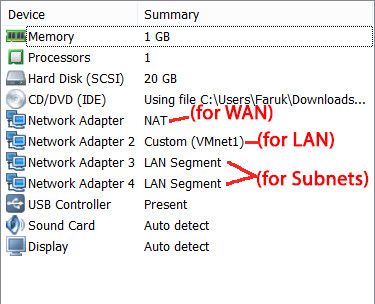
VMnet1 is configured as Host-Only, we’ll access the web interface using this adapter.
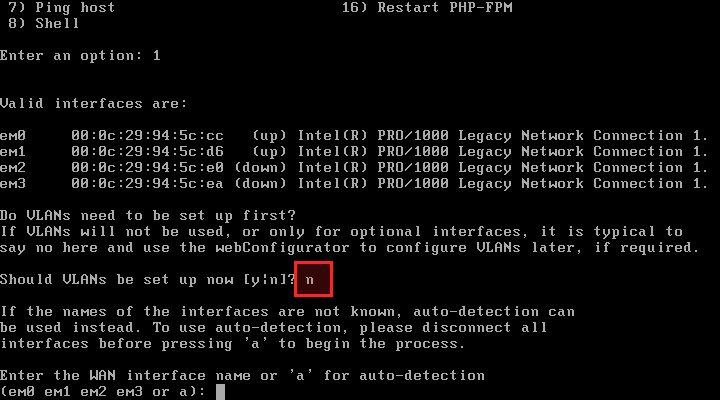
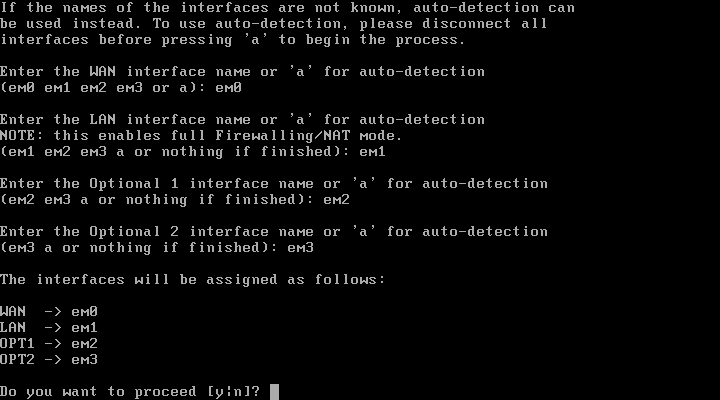
After enter the sub menu, the system lists adapters. Now, we’ll complete the assignment. (We don’t set VLANs now, you can set it later, using web interface.)
- WAN -> em0
- LAN -> em1
- Opt1 -> em2 (10.0.5.10, gateway for computers which are in this subnet)
- Opt2 -> em3 (10.0.6.10, gateway for computers which are in this subnet)
Now, after press “y” to proceed, we have to set IP addresses for these adapters. So we use (2) Set Interface IP adresses sub menu.

Set WAN, I use NAT and I don’t want to static IP, if you want you can use static address.
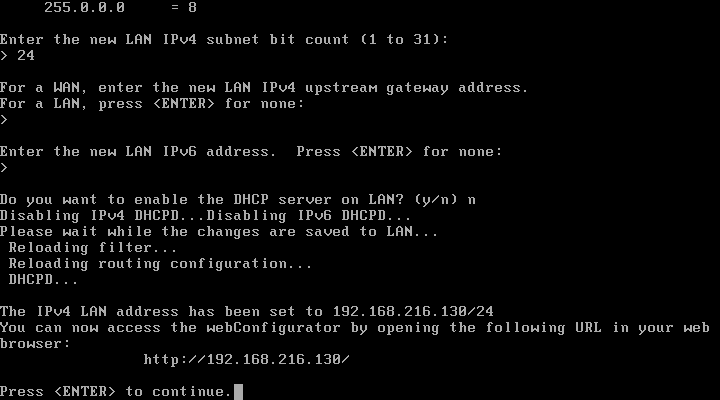
Set LAN. Using static IP is better, because we’ll use this address to access to the web interface.
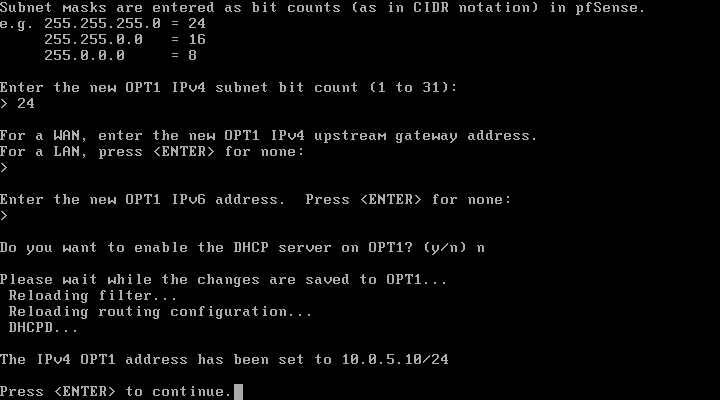
Set Opt1 and others.
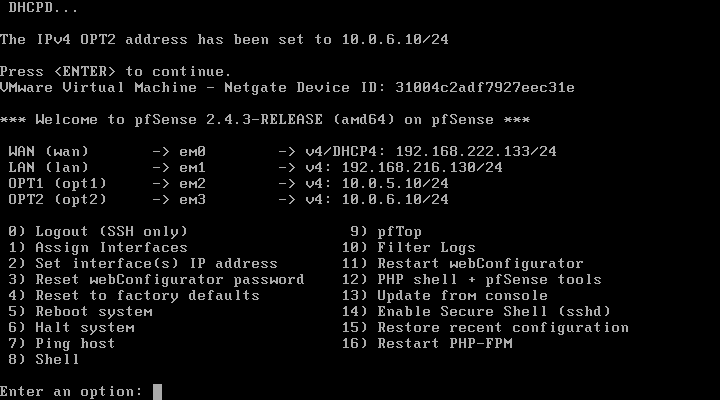
After complete all configurations, the main screen must be like this. You can verify your interfaces.
Now, let’s access to the GUI 🙂
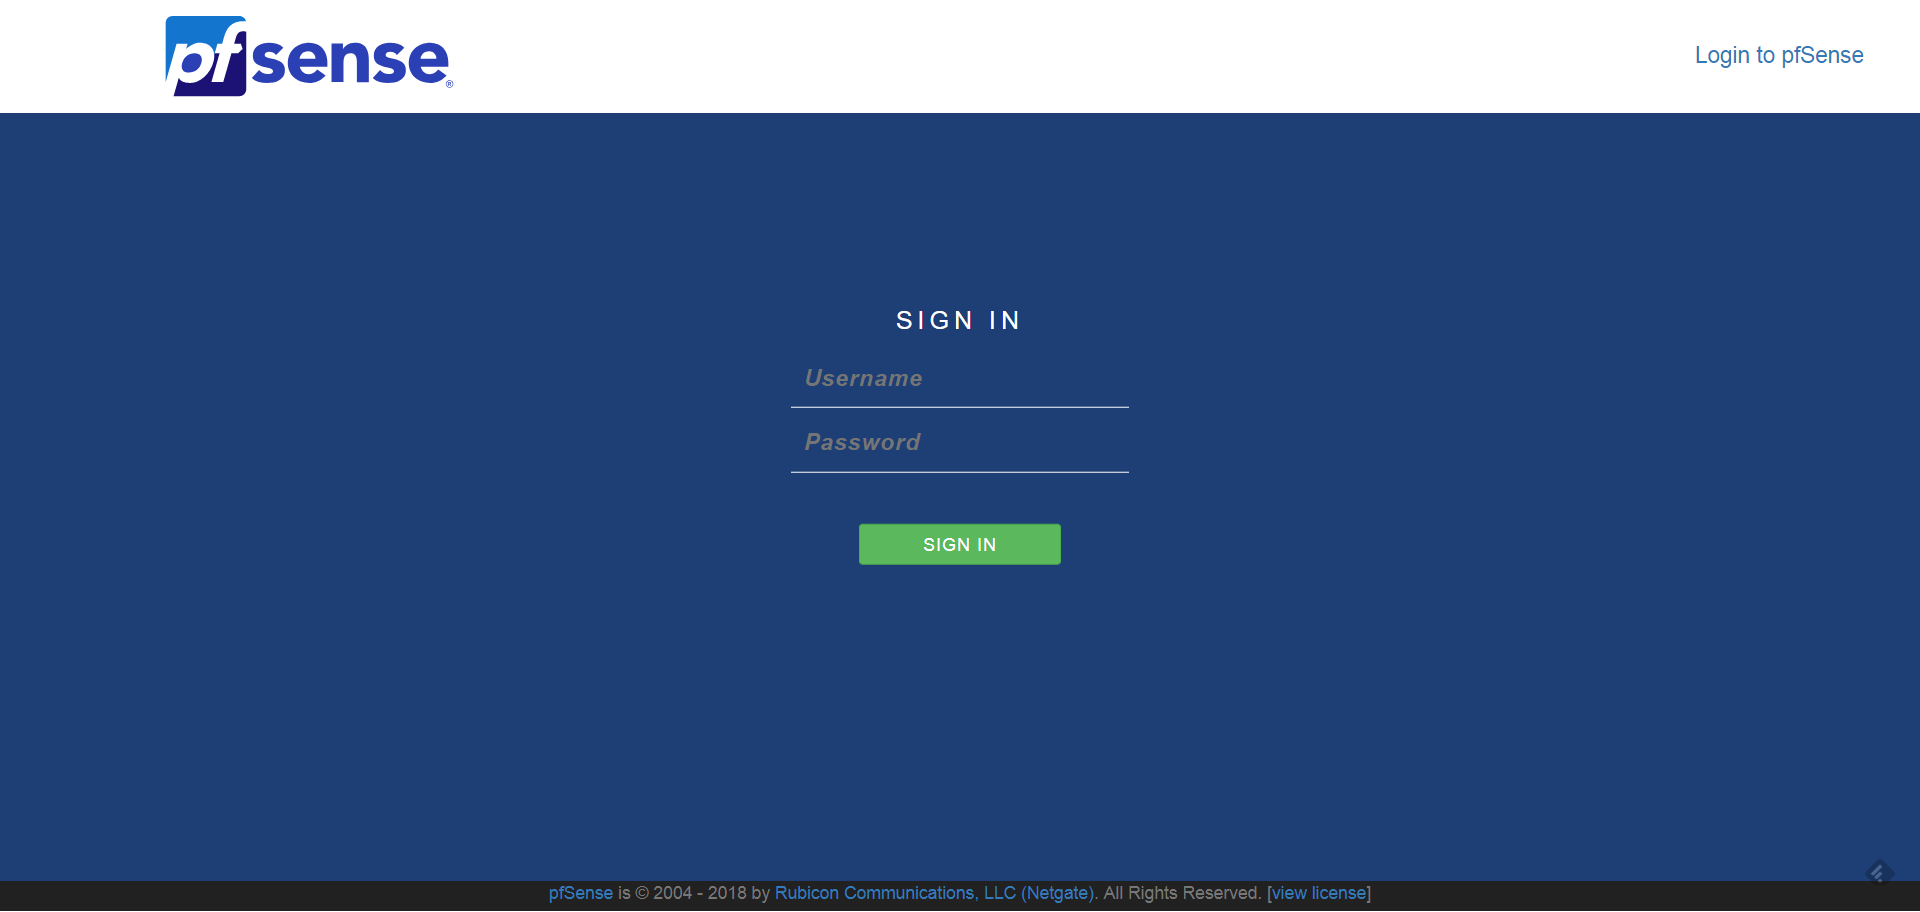
Type http://192.168.216.130
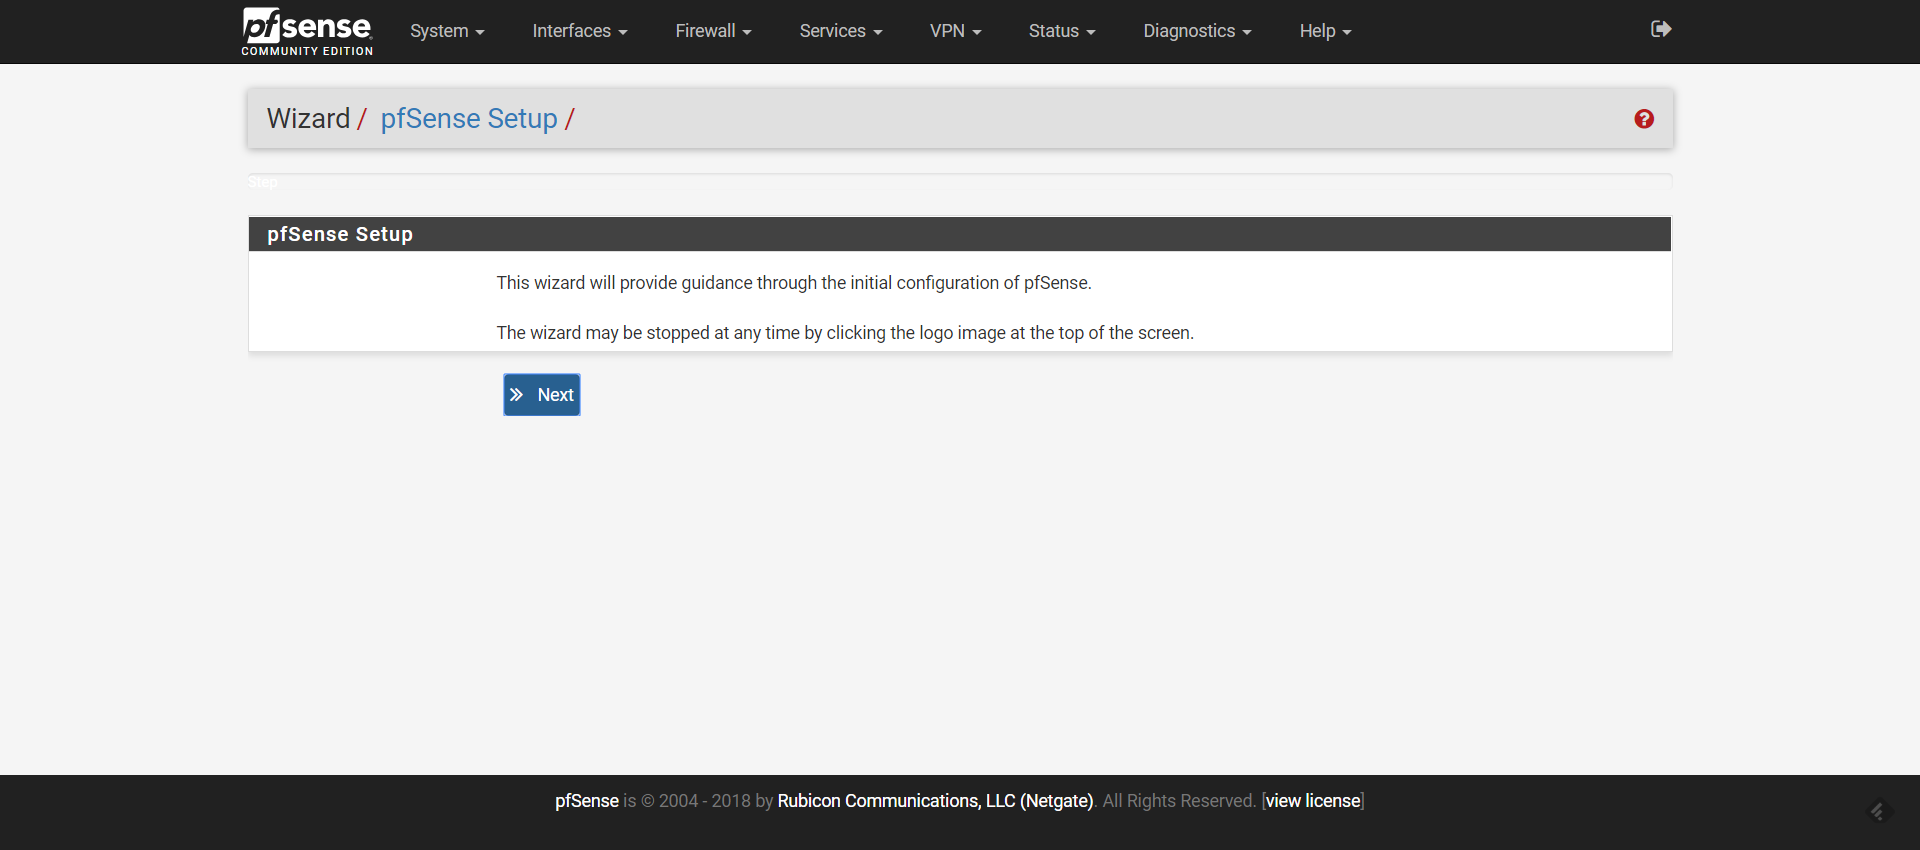
Login information is here; admin:pfsense Here is “Welcome Screen”, these configurations are little complex. So you can click the pfSense icon on the left corner of the top. So the wizard is completed automatically.
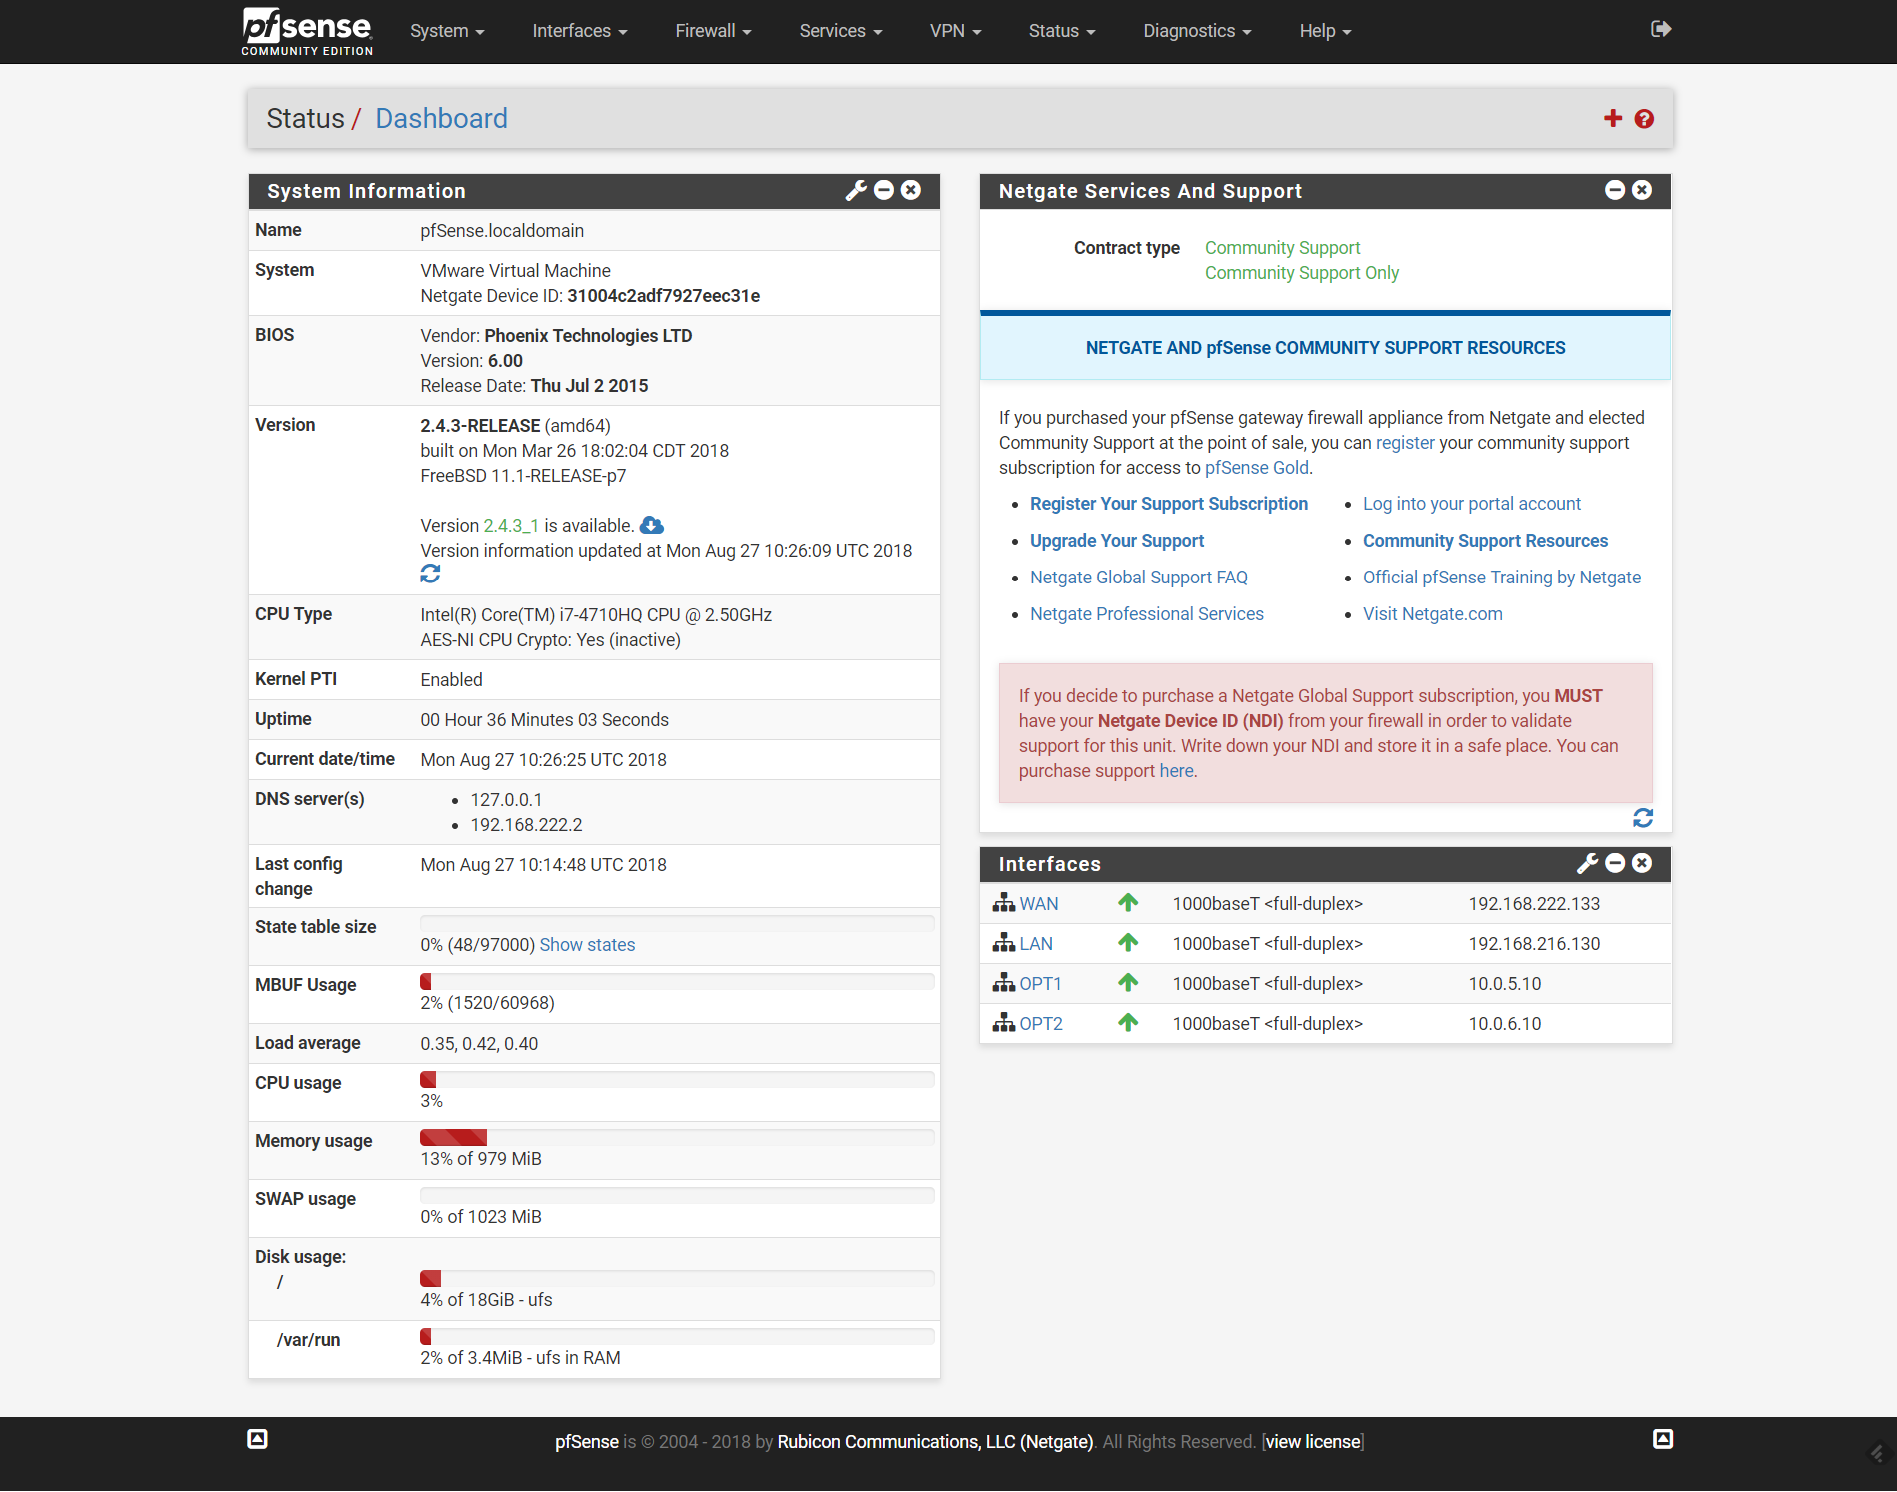
Main page…
You can try to explore “Firewall” menu and rules, I’ll write later about firewall rules 🙂
Leave a Reply