

It may be the most fun and didactic article in my blog page. There are a few communication methods to provide communicate between electronic modules and one of them is i2c. If you want to learn about i2c in details, you should research before you try implementation.
In this method, we use only two wires to exchange information, their names are SDA and SCL. Also, if you want advice for resource, here. It’s the best tutorial I’ve ever seen.
In this post, we’re going to setup i2c communication between Arduino and PSoC 5LP. We’re going to use Arduino UNO and PSoC 5LP cy8ckit-059. Before we start, we have a summarize. Also, it’s important to know which device is master and which device is slave because your design depends on this.
- Design PSoC hardware and develop the software
- Test your PSoC using Bridge Control Panel
- Develop the software on your Arduino
- Wire (Important) (GND->GND)
- Run
We have a test software but it works only with USB. Actually, I heard a device to analyze i2c logic bus, but I don’t know clearly.
Our PSoC program receives two bytes from Arudino and uses these values to set brightnnes of LEDs, here are steps with details;
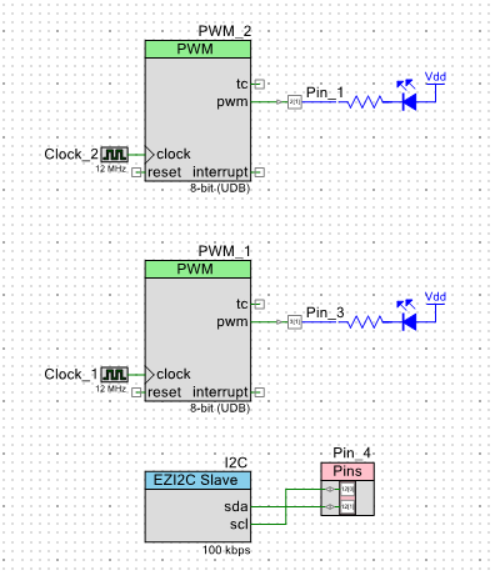
1. Design PSoC hardware, I want to manage two leds so it is the reason why I have two PWMs.
2. Build and develop your main.c code. Then, Program your card.
[code]
#include "project.h"
uint8 i2cbuf[2];
int main(void)
{
CyGlobalIntEnable; /* Enable global interrupts. */
i2cbuf[0]=1; //Default value
i2cbuf[1]=1; //Default value
PWM_1_Start();
PWM_2_Start();
I2C_Start();
I2C_SetBuffer1(2,2, i2cbuf);
for(;;)
{
PWM_1_WriteCompare(i2cbuf[0]*10);
PWM_2_WriteCompare(i2cbuf[1]*10);
}
}
[/code]
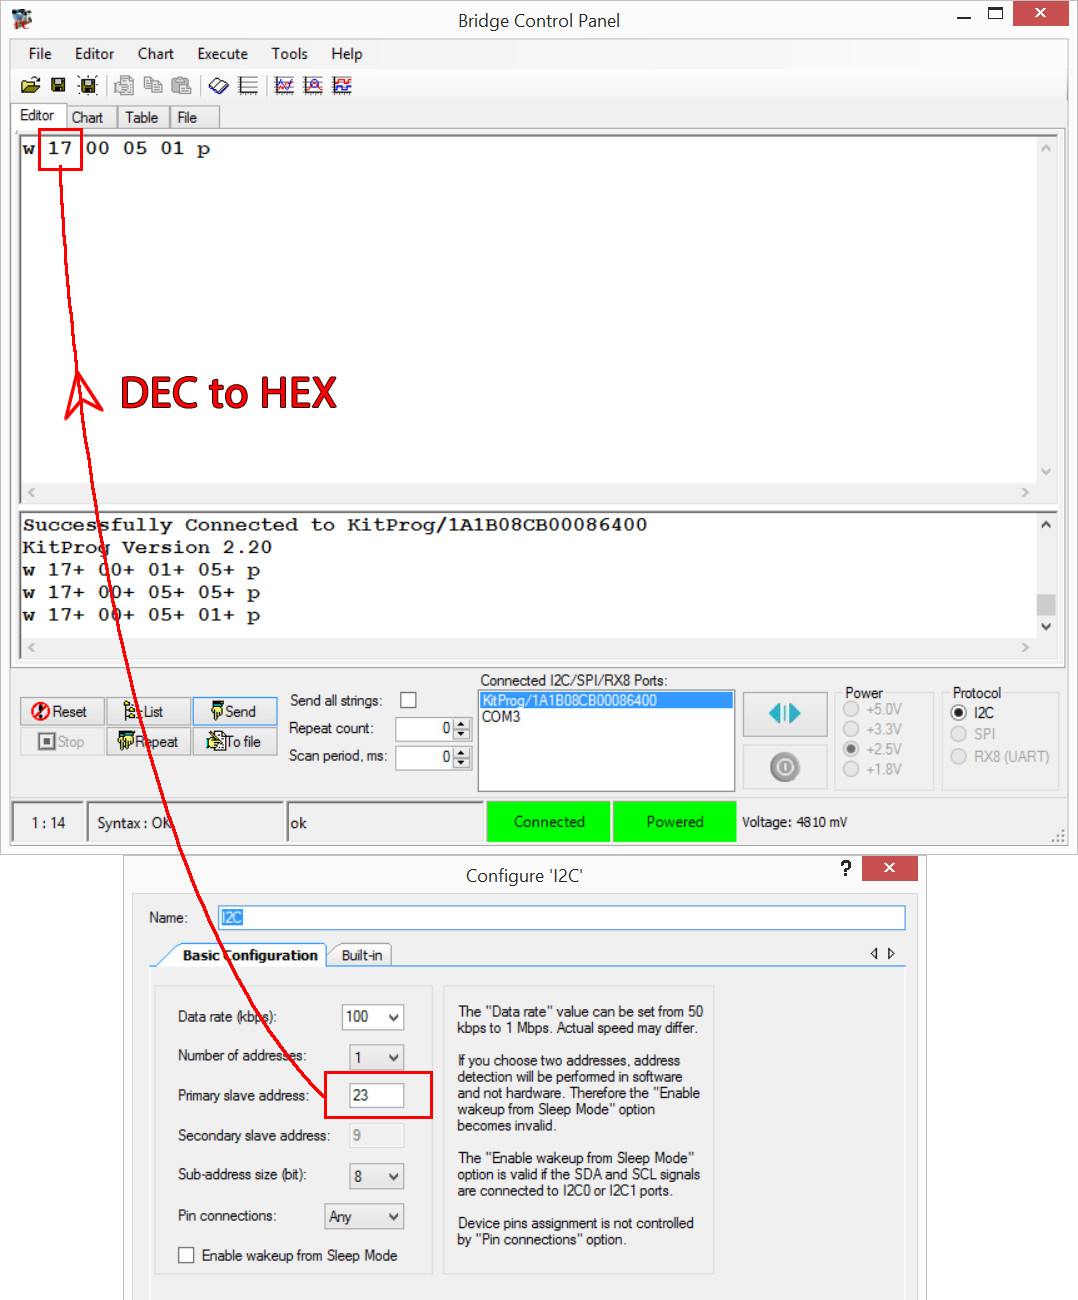
3. Test using Bridge Control Panel. It is so important to convert i2c address from dec to hex in Bridge Control Panel.
4. Develop your sketch for Arduino side. In this side, use the decimal value for address.
[code]
#include <Wire.h>
void setup() {
Serial.begin(9600);
Wire.begin();
Wire.onRequest(sendWire);
}
void sendWire(){
Serial.println("Sending…");
Wire.beginTransmission(23);
byte y=Wire.write(0x00);
byte z=Wire.write(1);
byte x=Wire.write(8);
Wire.endTransmission();
Serial.println("Sent…");
Serial.print(y);
Serial.print(z);
Serial.print(x);
Serial.print("\n");
}
void loop() {
while(Serial.available()>0){
int x=Serial.read();
if(x==49){
sendWire();
}
}
}
[/code]
5. Wire. It’s so important to wire ground to ground between two devices.
Leave a Reply